The most effective ways to prevent ant infestations are to remove accessible meals, correct damp conditions, block structural gaps, maintain outdoor areas, monitor early activity, and use targeted treatments only when necessary. A coordinated approach works better than killing individual workers because the colony and the conditions supporting it may remain.
Ant activity is common across Canada, especially during spring and summer when colonies become more active.
To prevent ant infestations, homeowners need to make their properties harder to enter and less rewarding once scouts arrive. Finding a trail across the kitchen counter does not necessarily mean a property is unclean.
These insects can enter well-maintained buildings through extremely small openings while searching for water, nesting conditions, and dependable nourishment. Ants are stubborn and keep coming back. Weather changes also affect their activity. The following six methods focus on long-term control rather than temporary removal.
1. Keep Kitchens and Storage Areas Unattractive
The kitchen is one of the first places homeowners notice activity because it provides several resources in a relatively small area.
Workers may locate crumbs, grease, sugary spills, pet dishes, recycling residue, fruit, or damaged packages. Once a scout finds a dependable resource, it can leave a chemical trail that directs other colony members to the same location.
A practical ant prevention plan begins by reducing these rewards.
Clean Spills and Crumbs Promptly
Small amounts of residue can support repeated activity. Pay particular attention to:
- Areas beneath refrigerators and stoves.
- Gaps between counters and appliances.
- Cabinet corners and drawer tracks.
- Toasters, coffee stations, and baking areas.
- Floors beneath dining tables.
- Children’s eating areas.
- Pet feeding stations.
- Garbage and recycling containers.
Wiping a visible counter is helpful, but hidden residue often matters more. Pull movable appliances away from walls periodically and clean the floor, sides, and surrounding baseboards.
Grease around cooking equipment should also be removed. Not every species is attracted primarily to sugar. Some seek protein, oils, or other materials depending on the colony’s needs.
Store Groceries in Sealed Containers
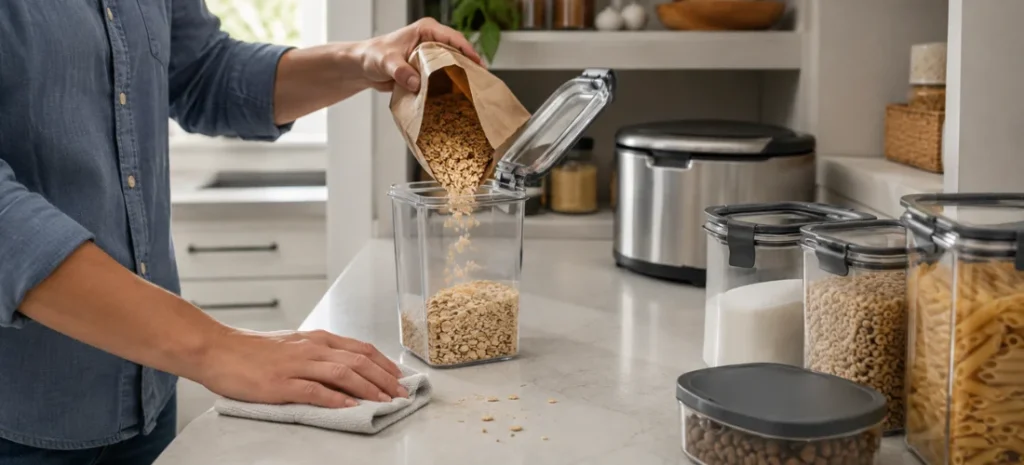
Open paper and cardboard packages are easy to enter. Transfer sugar, cereal, flour, baking ingredients, snacks, and animal feed into containers with secure lids.
Inspect packages before placing them in a pantry. A leaking syrup bottle, damaged bag, or unsealed box can create a reliable feeding area that remains unnoticed for weeks.
The same rule applies to pet supplies and bird seed. Large bags are often stored in garages, basements, or laundry rooms where activity is less likely to be noticed immediately.
Manage Waste Carefully
Use garbage containers with properly fitted lids and empty them regularly. Wash recycling items when residue is likely to remain, particularly beverage bottles, cans, jars, and takeout packaging.
Indoor compost containers should close securely and be cleaned often. Outdoor bins should remain covered and positioned away from doors where practical.
| Household task | Recommended frequency | Why it helps |
|---|---|---|
| Wipe counters and tables | After meals | Removes sugary and greasy residue |
| Sweep exposed floors | Daily | Clears crumbs along travel routes |
| Clean beneath appliances | Monthly | Removes hidden buildup |
| Empty indoor waste | As needed | Reduces persistent odours |
| Check pantry packages | Every few weeks | Finds spills and damaged packaging |
| Wash pet dishes | Daily | Removes residue between feedings |
The objective is not to create a perfectly sterile kitchen. It is to ensure that scouts do not find a dependable reward worth returning to.
2. Correct Damp and Water-Damaged Areas
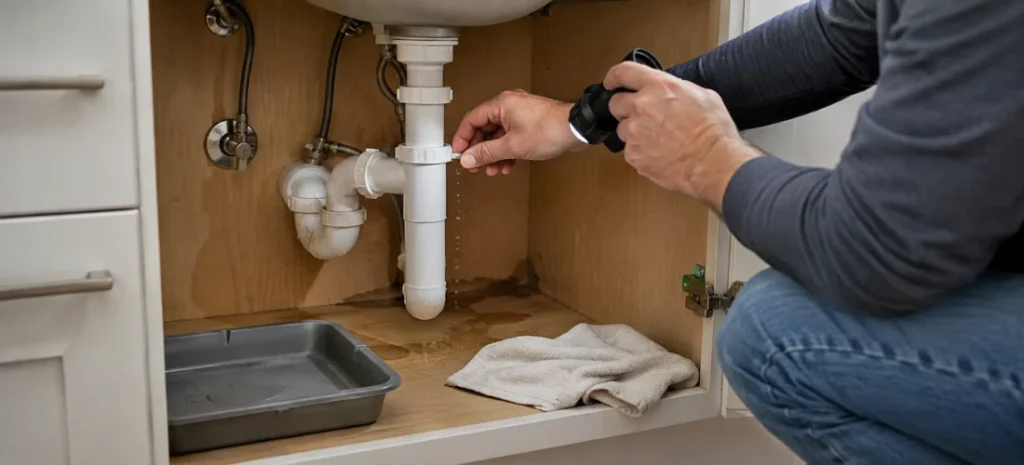
Water availability is another major factor behind indoor activity. Leaking plumbing, condensation, poor drainage, and damaged wood can create attractive conditions even when edible materials are well controlled.
Moisture also attracts ants, especially when dealing with carpenter ant activity, as these insects frequently nest in damp, softened, or decaying wood.
Check Plumbing Fixtures
Inspect beneath sinks, around dishwashers, behind washing machines, and near water heaters. Look for slow leaks, damp cabinet flooring, stained drywall, swollen materials, or a musty smell.
A pipe does not need to be visibly dripping at the time of inspection. Intermittent leaks may occur only when an appliance runs or a particular fixture is used.
Repair the source rather than simply drying the visible surface. Materials that remain damp may continue to deteriorate and support concealed activity.
Improve Exterior Drainage
Water should flow away from the foundation. Blocked gutters, short downspouts, poor grading, and overwatering can keep soil and building materials wet.
Check whether:
- Gutters are clean and functioning.
- Downspouts discharge away from the structure.
- Soil slopes away from the foundation.
- Sprinklers spray directly against exterior walls.
- Decks trap water beside the building.
- Window wells drain correctly.
- Exterior taps or hoses leak.
Landscaping should not keep siding, wood trim, or foundation areas continuously wet.
Replace Damaged Wood
Soft or decaying wood should be evaluated and replaced where needed. Pay attention to window frames, porch posts, roof edges, decks, door frames, and areas affected by previous leaks.
Controlling water-related damage does more than reduce insect activity. It also protects the building from mould, deterioration, and expensive repairs.
3. Block Gaps Around the Building
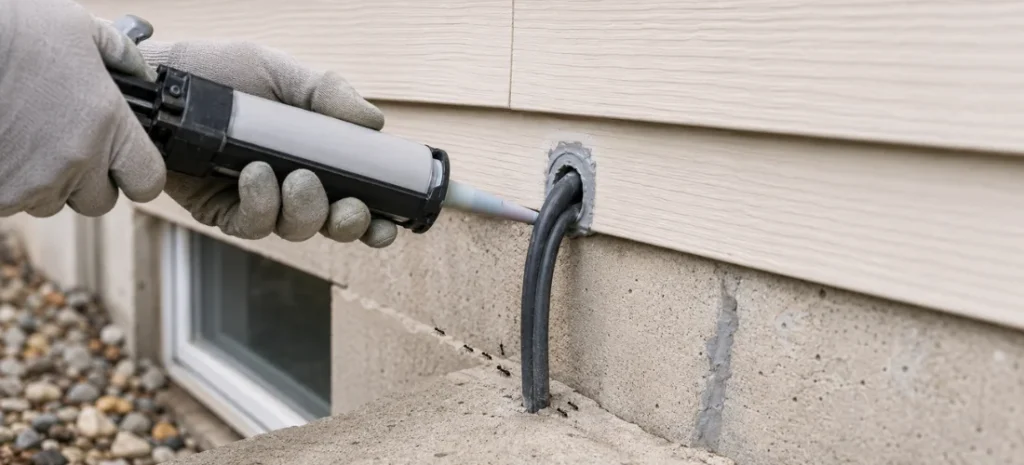
These insects can pass through openings that are easy to overlook. Cracks around foundations, windows, siding, utility lines, and doors may provide direct routes indoors.
Homeowners who want to prevent ants in house should inspect the exterior rather than relying only on treatments applied inside.
Inspect the Foundation
Walk around the building slowly and check:
- Foundation cracks.
- Gaps beneath siding.
- Openings around pipes and cables.
- Damaged mortar.
- Basement window frames.
- Exterior vents.
- Areas where additions join the original structure.
- Spaces beneath door thresholds.
Look at the same areas from inside the basement when possible. Daylight visible around a penetration can indicate a gap requiring attention.
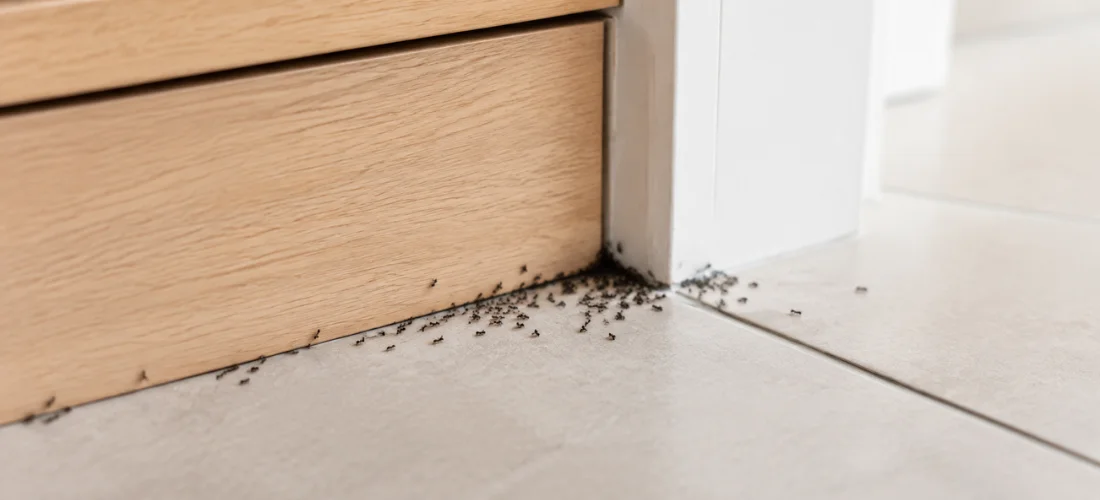
Follow visible trails to determine where workers disappear. Their route may lead directly to one of the building’s entry points.
Repair Door and Window Gaps
Replace worn door sweeps and damaged weatherstripping. Check sliding doors, garage entrances, basement doors, and windows that are opened frequently during warmer weather.
Window screens should fit correctly and remain free of tears. Frames may also require repair where caulk has separated or wood has deteriorated.
Use Appropriate Materials
Different openings require different repair methods. Exterior-grade caulk may work for narrow stationary cracks, while mortar repair, flashing, mesh, or professional structural work may be more appropriate elsewhere.
The goal of sealing is to create a durable barrier, not merely cover the visible surface temporarily.
| Location | Typical problem | Practical response |
|---|---|---|
| Foundation | Cracks or damaged mortar | Repair with suitable masonry materials |
| Exterior doors | Worn sweep or loose frame | Replace damaged components |
| Windows | Failed caulk or torn screen | Repair frame and screen |
| Utility lines | Open space around pipes or cables | Close with a durable compatible material |
| Siding | Loose panels or open lower edges | Repair damaged exterior finish |
| Basement | Gaps around framing and services | Inspect from both sides where possible |
Structural repair reduces indoor access, but it works best when combined with sanitation and exterior maintenance.
4. Maintain the Yard and Building Perimeter
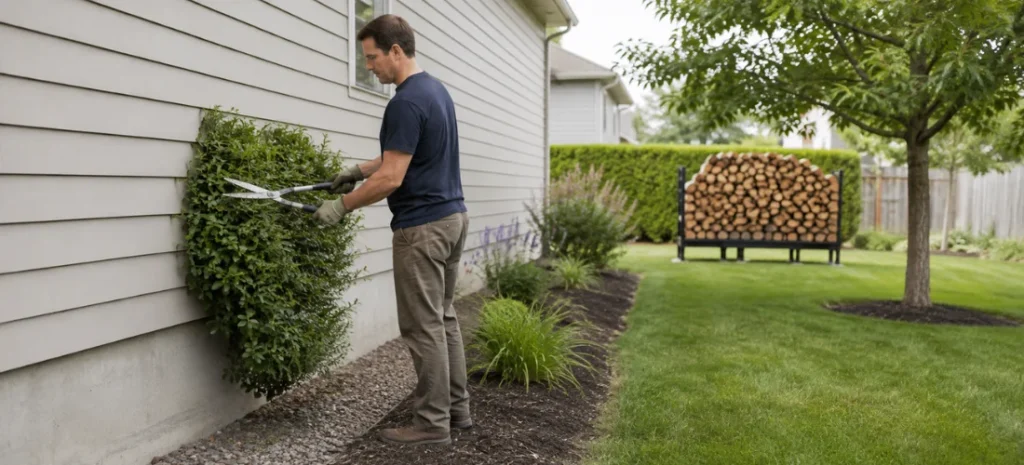
A colony outside does not always become an indoor problem. Risk increases when nests, branches, vegetation, or stored materials are positioned close to the building.
Good outdoor maintenance creates distance between the structure and likely harbourage areas.
Trim Vegetation Away From Exterior Walls
Branches and dense plants touching siding, windows, roofs, or decks can provide protected travel routes.
Trim shrubs so air and light can reach the soil and foundation. Avoid allowing climbing vines to cover structural gaps because they can hide trails and make inspections difficult.
Tree branches should not rest against roofs or upper walls. They may provide access to soffits, vents, and damaged trim.
Move Firewood and Lumber
Store firewood outside and away from the building. Raise it from the ground where possible and avoid placing it directly against siding, foundations, decks, or garages.
Old lumber, tree stumps, landscape timbers, and buried wood can support carpenter ant colonies, particularly when decay has begun.
Inspect logs before bringing them indoors. Carry in only the amount needed for immediate use rather than storing a large supply in a basement or attached garage.
Review Mulch and Landscaping Materials
Decorative bark and mulch can retain dampness when applied too deeply or pushed tightly against a foundation.
Leave a visible inspection space beside the building. This makes trails, cracks, and damaged materials easier to notice.
Retaining walls, wooden borders, old stumps, and decorative wood should also be checked for deterioration.
Limit Outdoor Feeding Opportunities
Clean spills around waste containers, outdoor cooking areas, and recycling storage. After a barbecue or gathering, remove sweet drinks, sauces, grease, and discarded packaging.
Feed animals in controlled locations and avoid leaving dishes outdoors overnight. Clean spilled bird seed and fallen fruit that accumulates near the building.
The aim is to prevent outdoor colonies from establishing dependable routes toward the structure.
5. Identify Trails and Respond Early
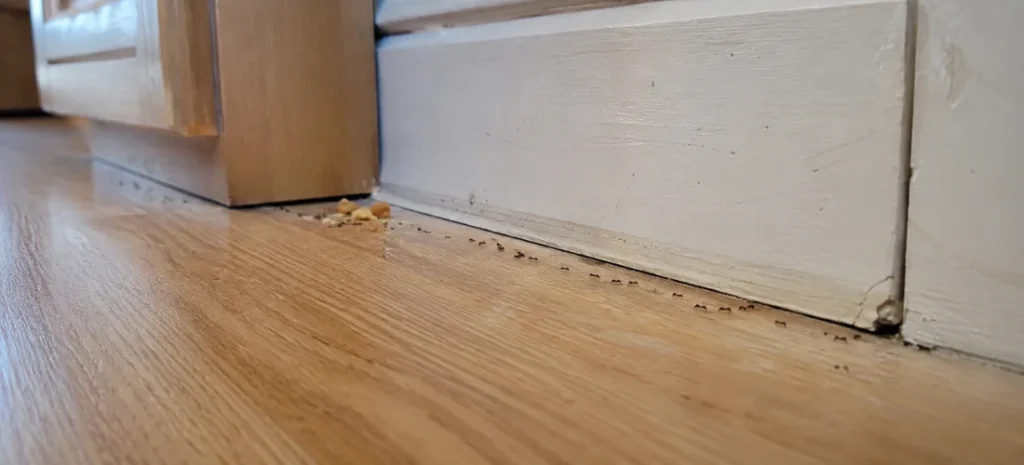
A few workers can provide useful information. Their movement may reveal what attracts them, where they enter, and whether the colony is likely located inside or outdoors.
Simply wiping away the visible insects without inspecting their route removes that information.
Observe the Direction of Travel
Watch where workers emerge and where they go. A trail may connect:
- A foundation crack to a kitchen.
- A window frame to a counter.
- A sink cabinet to a wall opening.
- A deck to an exterior door.
- A tree branch to a roof edge.
- An appliance to a baseboard gap.
The presence of ants in home does not automatically reveal the nest location. Workers may travel a considerable distance from an outdoor colony, or they may be coming from a satellite nest concealed in the building.
Clean Trails After Inspection
After identifying the route, clean the surface using ordinary soap and water. This helps remove the chemical trail used to guide other workers.
Cleaning alone is not a complete solution. The access route and attraction must also be corrected.
Avoid spraying workers randomly along a trail. Repellent sprays may kill visible individuals but can interfere with bait acceptance or cause activity to shift to another location.
Monitor Repaired Areas
After cleaning and repairing the suspected route, continue checking the area.
Record where activity appeared, when it was noticed, and whether it returned. Monitoring helps distinguish an isolated incident from an established problem.
Inspect during different times of day. Some ant colonies are more noticeable in the evening, during warm weather, or after rain.
6. Use Targeted Control When Necessary
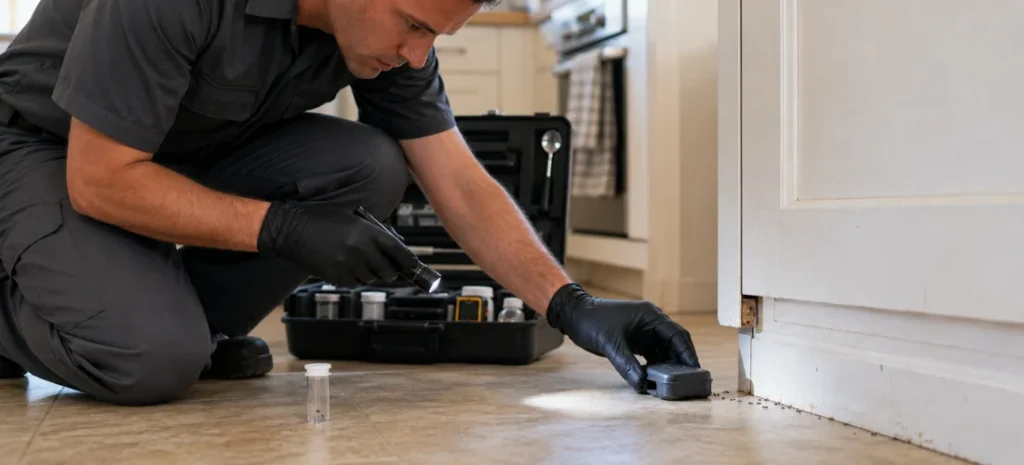
Sanitation, repair, and outdoor maintenance can greatly reduce risk, but an established colony may still require treatment.
The appropriate method depends on the species, colony location, activity level, and building conditions.
Identify the Species Before Treatment
Small pavement, pharaoh, odorous house, thief, and carpenter ant varieties do not necessarily respond to the same strategy.
Carpenter workers are relatively large and may indicate damp or damaged wood nearby. Finding coarse wood debris beneath an opening can be a warning sign of nesting activity.
Very small workers around kitchens or multi-unit buildings may require a carefully coordinated baiting approach. Applying the wrong repellent product can spread activity into other areas.
Consider Baits Instead of Routine Spraying
Baits are designed to be carried or shared within the colony. They may take longer to produce a visible reduction, but they can address more than the workers seen on a counter.
Placement matters. Baits should be positioned near active trails while remaining inaccessible to children and animals. They should not be contaminated with cleaners or competing products.
Preferences can also change. A colony that accepts a sweet bait at one stage may seek protein or grease at another.
Follow Canadian Product Requirements
Use only products registered for the intended purpose in Canada. Check the label for a Pest Control Products registration number and follow every direction, restriction, and safety precaution.
Do not prepare homemade pesticide mixtures. A household ingredient can still create exposure risks when concentrated, mixed, or placed in accessible locations.
Know When to Contact a Professional
Professional ant control is advisable when:
- Activity returns after repeated cleaning.
- Trails appear in several rooms.
- Workers emerge from walls or ceilings.
- Large winged individuals appear indoors.
- Damp or damaged structural wood is suspected.
- The colony cannot be located.
- Activity affects several apartments or units.
- Children or animals make product placement difficult.
- The same problem returns every season.
A technician can identify the species, trace movement, inspect damp areas, evaluate structural conditions, and determine whether treatment, repair, or follow-up monitoring is required.
A Simple Seasonal Prevention Schedule
Canadian seasons change where colonies forage and how homeowners use their properties. A year-round routine makes early detection easier.
| Season | Primary focus | Useful action |
|---|---|---|
| Spring | Emerging trails | Inspect foundations after snowmelt |
| Summer | Outdoor foraging | Manage patios, bins, and landscaping |
| Autumn | Structural maintenance | Repair cracks before cold weather |
| Winter | Concealed indoor activity | Check kitchens, bathrooms, and basements |
Spring is often the best time for a detailed exterior inspection. Freeze-and-thaw cycles may reveal new cracks or weaken old repairs.
Summer requires closer attention to outdoor meals, waste, and dry conditions. Autumn is useful for completing structural repairs, while winter monitoring can identify colonies sustained by indoor heating.
Investing in professional pest extermination services helps save money, time, and property structure. Invaders Canada uses a combination of IPM strategies to control and prevent pest infestations and issues.
You can keep your property free of pests and infestations by investing in professional help early. Contact us today for a detailed consultation.
Conclusion
The best way to prevent ant infestations is to make the property less accessible and less supportive of colony activity. Cleaning visible workers is not enough when damp materials, structural gaps, outdoor harbourage, or dependable resources remain. Focus first on sanitation, plumbing repairs, exterior drainage, durable structural maintenance, yard management, and early monitoring. Use registered targeted products only when necessary and always according to the label. Arrange a professional inspection for continued activity.
FAQs
Why do ant trails suddenly appear in spring?
Warmer temperatures increase colony activity and encourage workers to search for resources. Spring rain and melting snow can also disturb outdoor nests or change conditions around foundations.
Does seeing one worker mean there is a nest inside?
Not necessarily. A single worker may have entered from an outdoor colony. Repeated trails, activity emerging from walls, or winged individuals indoors provide stronger reasons to suspect an internal nest.
Is vinegar enough to stop an infestation?
Vinegar may help remove scent trails from a surface, but it does not remove the colony or correct the access route. It should be viewed as a cleaning step rather than a complete control method.
Are carpenter varieties dangerous to a building?
They do not eat wood, but they excavate damp or weakened material to create nesting galleries. Their presence may point to a leak, decay, or another condition requiring repair.
When should a professional inspection be arranged?
Contact a professional when activity repeatedly returns, appears in multiple rooms, involves large winged individuals, or seems connected to damp structural wood or concealed wall spaces.